Follow Me On Social Media!

Butterfinger Cake: Indulgently Sweet and Totally Irresistible
Introduction to Butterfinger Cake
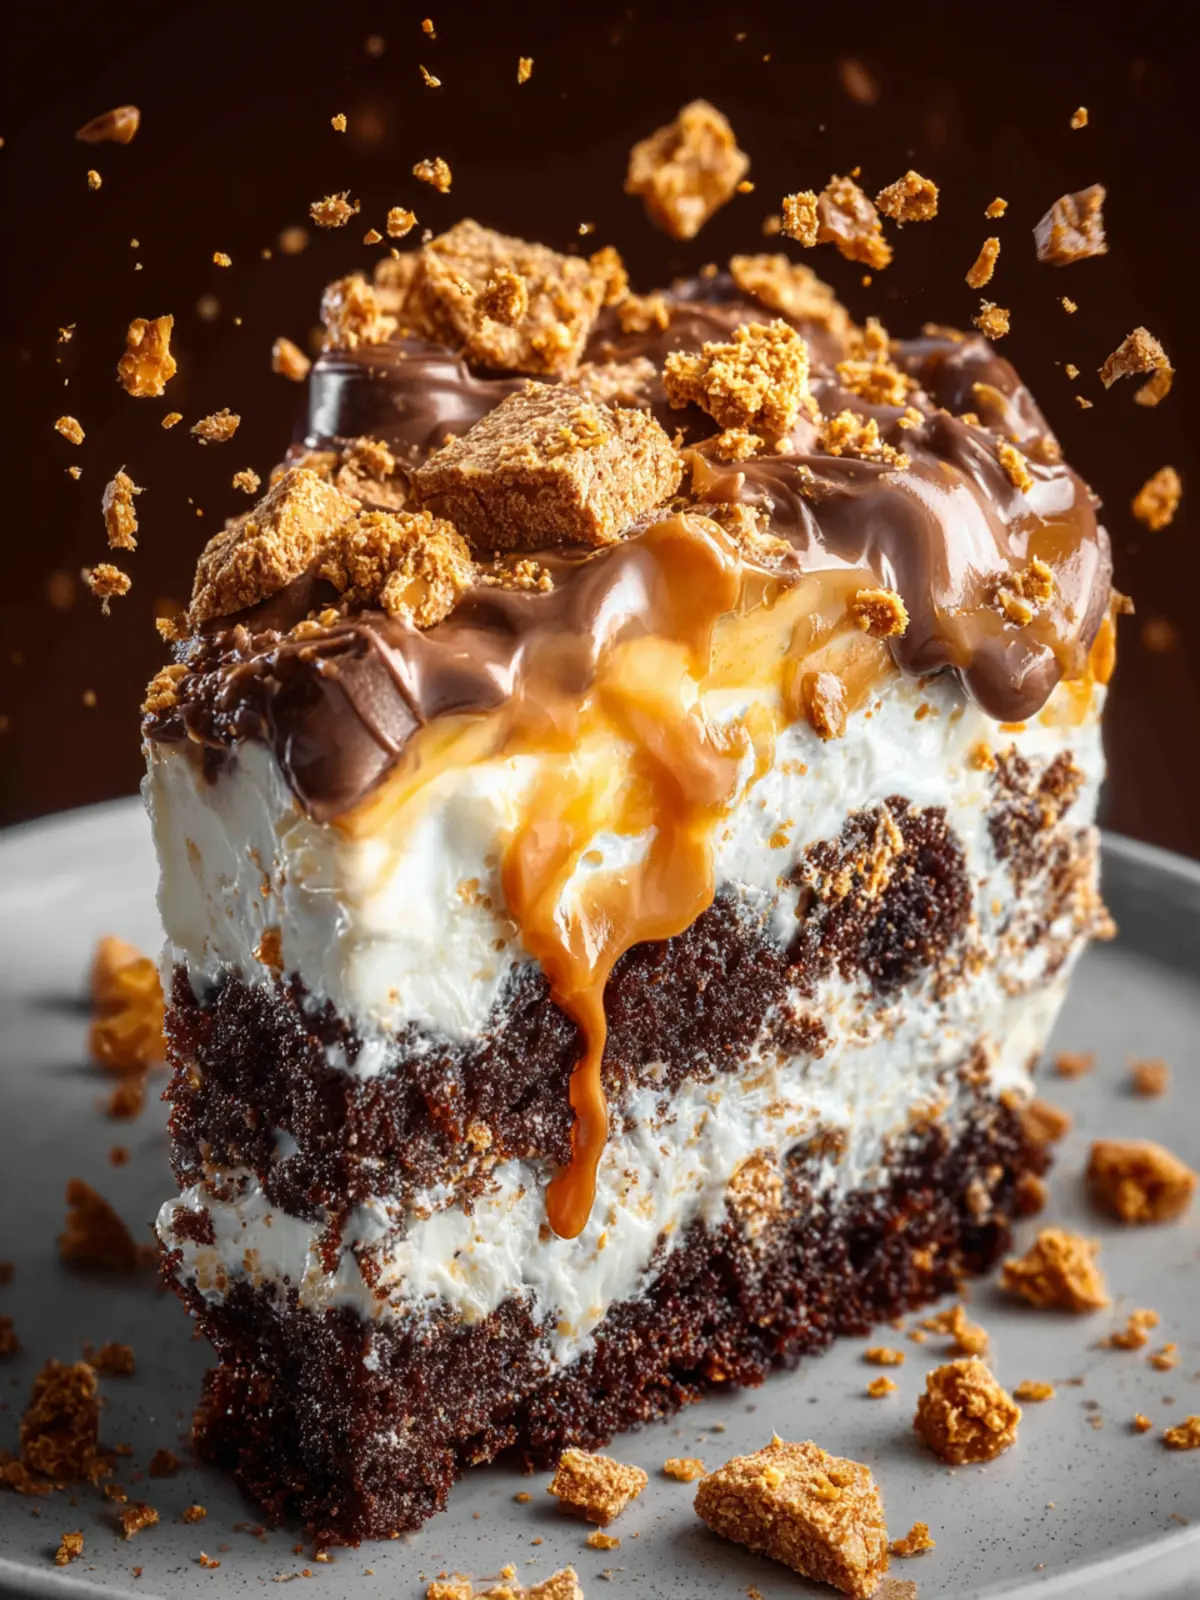
Imagine treating yourself to a dessert that embodies the nostalgic taste of your favorite childhood candy bar, buttery and satisfying at the same time. That’s exactly what you get with Butterfinger Cake—a dessert that transforms the delightful crunch and peanut butter flavor of Butterfinger bars into a magnificent cake that could easily steal the spotlight at any gathering. With its unique combination of sweet, creamy frosting and rich chocolate, this cake isn’t just a treat; it’s an experience that beautifully balances flavor and texture.
What makes Butterfinger Cake a must-try dessert?
Butterfinger Cake isn’t just about the chocolate and peanut butter indulgence; it combines several elements that make it irresistible:
- Crisp Texture: The crushed Butterfinger candy bars added to the frosting gives a delightful crunch that contrasts perfectly with the cake’s softness.
- Rich Flavor: The infusion of creamy peanut butter into the frosting and the buttery cake layers creates a rich flavor profile that appeals to both kids and adults alike.
- Showstopper Presentation: Topped generously with chocolate ganache and Butterfinger bits, this cake looks as good as it tastes, making it a perfect centerpiece for parties.
- Versatility: Whether you’re celebrating a birthday, hosting a dinner party, or just looking to impress a friend, Butterfinger Cake fits the occasion beautifully.
- Easy to Make: While it tastes gourmet, the recipe is straightforward enough for bakers of all levels. Even if you’re just starting out, this cake encourages creativity without overwhelming complexity.
This cake has often been a centerpiece at family gatherings in my home. The surprise and joy on everyone’s faces when they take that first bite are priceless. It’s a reminder that comfort desserts don’t have to be complicated; sometimes, they just need to hit all the right notes of nostalgia, flavor, and fun. So, let’s dive into this delicious adventure—your kitchen is the stage, and this Butterfinger Cake is ready for the spotlight!
Key Ingredients for Butterfinger Cake
The magic of a Butterfinger cake begins with its delightful blend of flavors and textures, bringing a nostalgic treat to the table that’s perfect for any occasion. Let’s dive into the key ingredients that make this cake a must-bake for chocolate and peanut butter lovers alike.
-
Butter: A rich, creamy ingredient essential for both flavor and texture. In this recipe, it’s the base that ensures our cake stays moist while also contributing to those delightful decadences in every bite.
-
Granulated Sugar: This is the sweet backbone of our butterfinger cake. Together with the butter, it creates a light, fluffy batter that rises beautifully.
-
Eggs: Using whole eggs is crucial here; they add moisture and structure to the cake. I always recommend picking room temperature eggs for the best emulsification.
-
All-Purpose Flour: This is standard in cake recipes for a good reason—it provides structure. You can substitute a gluten-free blend if needed, but the classic choice delivers that ideal texture.
-
Cocoa Powder: Unsweetened cocoa powder adds a deep chocolate flavor that complements the Butterfinger perfectly.
-
Baking Powder & Baking Soda: These leavening agents ensure that our cake rises well and maintains its lightness while baking.
-
Peanut Butter: The star of the show! Creamy or crunchy, peanut butter adds a rich flavor profile that pairs wonderfully with chocolate.
-
Butterfinger Candy Bars: Chopped into pieces, these not only add those iconic flavors but also introduce a delightful crunch.
Gather these ingredients, and you’re set to create a Butterfinger cake that will impress anyone lucky enough to have a slice!
Why You’ll Love This Butterfinger Cake
Imagine sinking your fork into a slice of Butterfinger Cake, where each bite transports you back to your childhood—those days filled with carefree laughter and the delightful crunch of a Butterfinger candy bar. This cake isn’t just a dessert; it’s a celebration of nostalgia and indulgence rolled into one decadent treat.
A Unique Fusion of Flavors
The magic of Butterfinger Cake lies in its perfect blend of chocolate and peanut butter flavors. Each layer is infused with the irresistible essence of Butterfinger, making it an instant favorite for any gathering. When friends and family gather around the table, watch their faces light up with joy as they sample this creamy, rich dessert.
Simple Yet Impressive
What makes this cake even more appealing is its simplicity. With easy-to-follow instructions, you can whip up this show-stopping dessert without breaking a sweat. Perfect for busy young professionals, this cake requires minimal effort while delivering maximum flavor.
Versatile for Any Occasion
Whether you’re celebrating a birthday, hosting a casual get-together, or simply craving something sweet at the end of a long day, this Butterfinger Cake fits the bill. The combination of its delicious flavors and beautiful presentation makes it suitable for any occasion.
Embrace the joy of baking with this delightful cake, and you’ll find it quickly becomes a staple in your dessert repertoire!

Variations of Butterfinger Cake
The delightful Butterfinger Cake is a canvas for your creativity in the kitchen! It’s rich, indulgent, and oh-so-satisfying, but why stop at just one version? Let’s explore some mouth-watering variations to keep things exciting.
Chocolate Lovers Delight
Why not take your Butterfinger Cake to the next level by incorporating chocolate? By adding a layer of melted chocolate ganache on top, you create a heavenly synergy of flavors. Just melt equal parts cream and dark chocolate, let it cool slightly, and drizzle it generously over your cake. The richness of chocolate perfectly complements the crunch of Butterfinger bars.
Peanut Butter Bliss
For those who cannot resist the allure of peanut butter, this iteration adds a layer of creamy peanut butter frosting between the cake layers. Combine equal parts powdered sugar and peanut butter with a splash of vanilla and a bit of milk for the perfect frosting that adds a nutty dimension to your cake.
Fun with Variants
Feel free to explore different types of candies or toppings. Swap out Butterfinger for crushed Oreos or M&M’s. You can even use flavored cake mixes—think vanilla or even red velvet—to change the flavor profile while keeping the essence of your Butterfinger Cake intact.
With these tasty variations, you can create an endless transformation of your beloved cake, making each occasion special! What will you try first?
Cooking Tips and Notes for Butterfinger Cake
Crafting the perfect Butterfinger Cake is more than just following a recipe; it’s about letting your personality shine through your baking. As you dive into this delightful creation, consider these tips to ensure your cake stands out.
Choosing Ingredients Wisely
- Butter: Opt for high-quality unsalted butter. It adds a rich base flavor that elevates your cake. Remember to let it soften at room temperature for easy mixing.
- Sugar: Using a combination of granulated and brown sugar can enhance the cake’s moisture and depth. Brown sugar provides a subtle caramel flavor.
- Peanut Butter: Select a creamy, good-quality peanut butter for a smoother batter. It also enhances the overall taste and aligns perfectly with the Butterfinger theme!
The Right Baking Technique
- Mixing Method: When combining the wet and dry ingredients, avoid overmixing. This ensures a tender cake without toughening the texture. Gently fold in until just combined for the best outcome.
- Baking Time: Keep an eye on the baking time; ovens vary. A toothpick inserted in the center should come out clean when your cake is ready.
Letting It Cool
After your Butterfinger Cake is baked, give it time to cool completely before icing. This helps the frosting to set nicely rather than melting away, resulting in a beautifully presented dessert.
Enjoying this cake is truly about sharing joy, so don’t hesitate to invite friends over to indulge with you!
Serving Suggestions for Butterfinger Cake
With your Butterfinger Cake ready to wow your taste buds, it’s time to think about how to serve this delightful dessert. Picture this: you’re hosting a casual get-together with friends, and the first slice of cake reveals its sumptuous layers, making everyone’s eyes light up. Here are a few ways to elevate your serving experience:
-
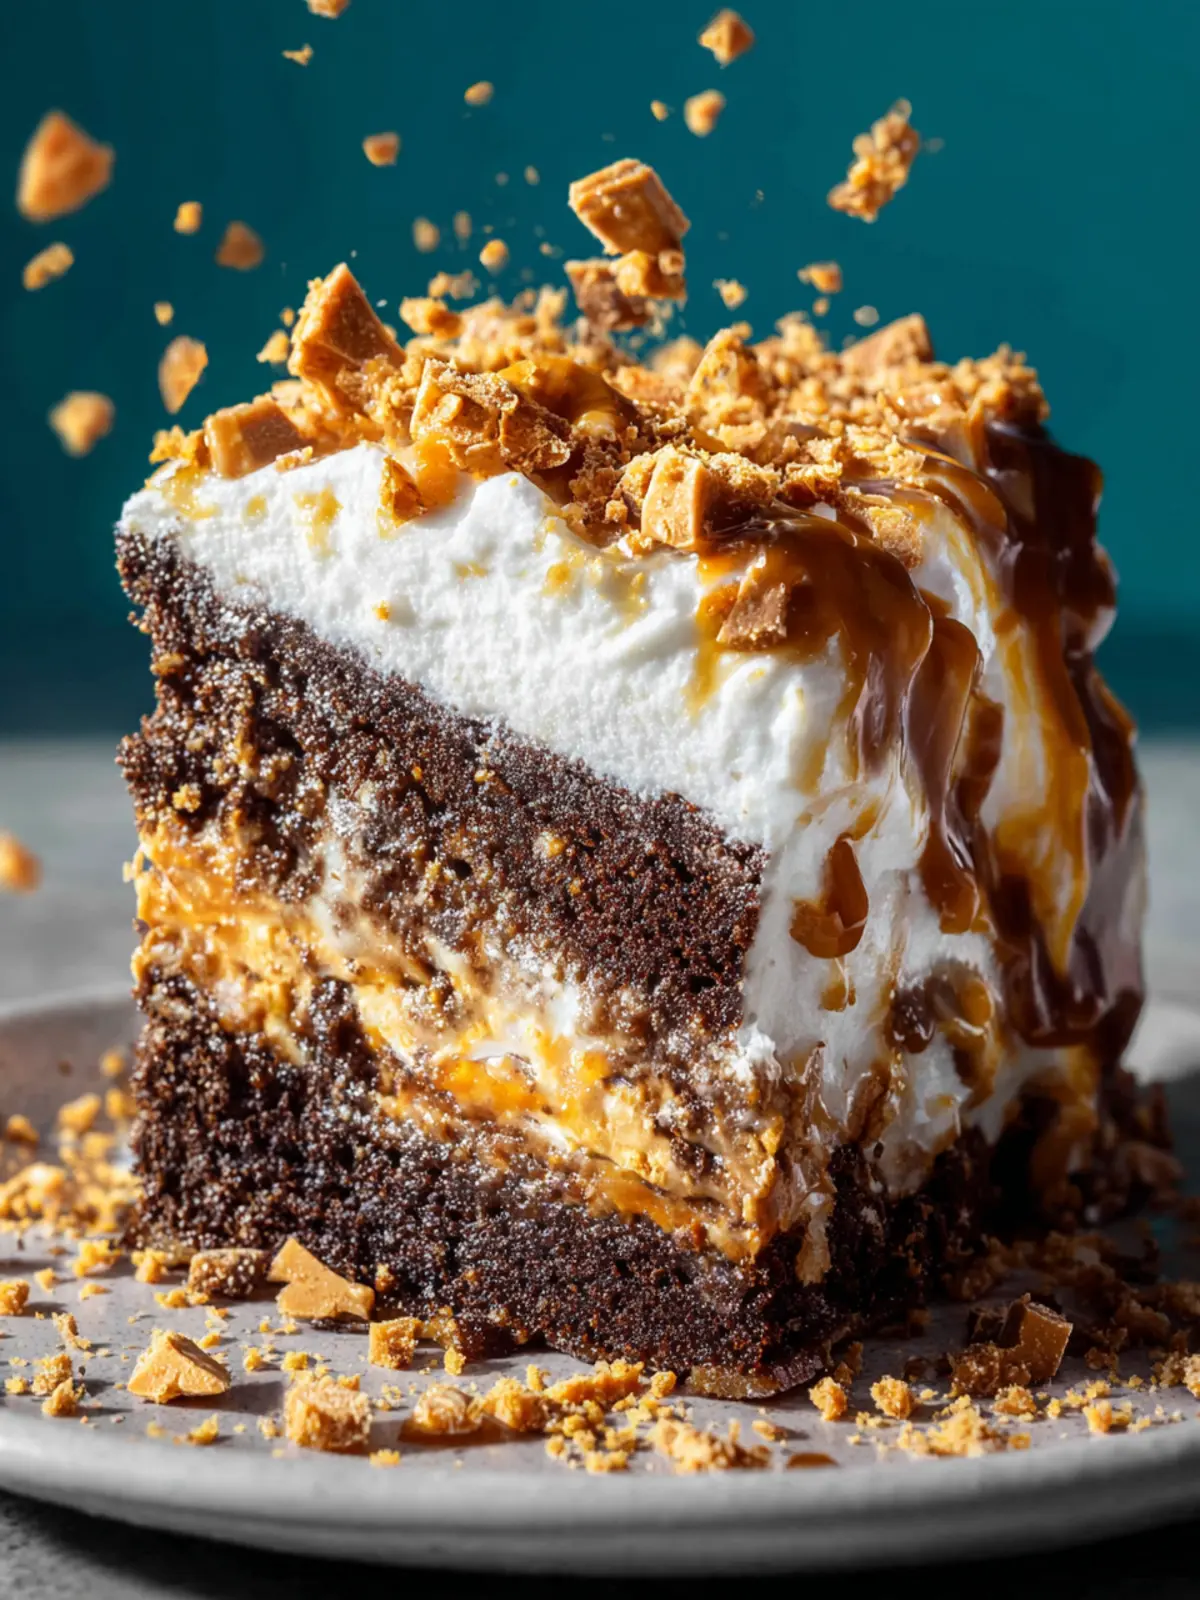
Garnish with Whipped Cream: A dollop of freshly whipped cream adds a fluffy contrast to the rich, dense textures of the cake. You could also sprinkle chopped Butterfinger bits on top for an extra crunch.
-
Serve à la Mode: Pair a slice of your Butterfinger Cake with a scoop of vanilla ice cream. The cold, creamy ice cream beautifully complements the chocolate and peanut butter flavors.
-
Beverage Pairing: A cup of freshly brewed coffee or a cold glass of milk can make for the perfect drink to enjoy alongside your cake. For a twist, try matching it with a stout beer or a dessert wine.
-
Slice Presentation: Ensure that each slice shows off the decadent layers, perhaps using a cake stand or a rustic wooden board for a charming display.
Embrace creativity while serving your masterpiece, and watch as your friends get hooked on this utterly irresistible Butterfinger Cake!
Time Breakdown for Butterfinger Cake
Creating a Butterfinger Cake is not just a culinary adventure; it’s a delightful way to indulge in the flavors of everyone’s favorite candy bar. Understanding the time commitment can make your baking experience smoother and more enjoyable.
Preparation Time
The prep work for your Butterfinger Cake takes about 20 minutes. This includes gathering your ingredients, mixing your batter, and preparing your baking dish.
Baking Time
Set aside approximately 30-35 minutes for baking. You’ll want to keep an eye on your cake to ensure it rises perfectly and transforms into a beautiful golden brown.
Total Time
In total, you’re looking at around 55-60 minutes from start to finish. That’s just enough time to set the mood for a sweet treat that will bring joy to any gathering!
Nutritional Facts for Butterfinger Cake
When indulging in a Butterfinger Cake, it’s essential to consider the nutritional balance of this delightful dessert. Packed with flavors and textures, this cake serves as a wonderful treat, but understanding its nutritional profile can help you enjoy it even more.
Calories
Each slice of Butterfinger Cake delivers approximately 350 calories. While it’s a delicious way to satisfy your sweet tooth, moderation is key.
Protein
You’ll find about 4 grams of protein per serving, thanks to the eggs and any dairy used in the recipe. This helps to provide a small boost of sustenance amidst the sweetness.
Sodium
With roughly 200 mg of sodium per slice, the Butterfinger Cake maintains a decent balance. It’s advisable to keep this in mind, especially if you’re watching your sodium intake.
By being aware of these nutritional facts, you can better appreciate your Butterfinger Cake experience while making informed choices.
FAQ about Butterfinger Cake
Creating a delightful Butterfinger Cake can spark questions, and we’re here to answer them! Let’s dive into the most common inquiries that arise when making this crowd-pleasing dessert.
Can I make Butterfinger Cake ahead of time?
Absolutely! Making Butterfinger Cake in advance is not just possible—it can actually enhance the flavors. You can bake the cake a day ahead and store it in the fridge, covered tightly. This resting period allows the flavors to meld beautifully. Just add the Butterfinger toppings right before serving for that crunch that everyone loves!
What are some recommended substitutions for the ingredients?
If you’re missing an ingredient or looking to make adjustments, here are some substitution suggestions for your Butterfinger Cake:
- Cake Mix: You can opt for a gluten-free cake mix if necessary.
- Butter: Unsalted butter is typically best, but you can use coconut oil or apple sauce for a dairy-free version.
- Milk: Swap in almond milk or any non-dairy alternative to keep it vegan while still moist.
- Candy Bars: If you’re not keen on Butterfinger, try crushed Twix or Reese’s for a twist.
How should I store any leftovers?
To store leftover Butterfinger Cake, cover it with plastic wrap or place it in an airtight container. It can last for about 3-4 days in the fridge. For longer storage, consider freezing it without the toppings. Just thaw it in the fridge overnight and then add your crunchies when you’re ready to indulge again!
Feel free to experiment and enjoy every delicious bite of your Butterfinger Cake!
Conclusion on Butterfinger Cake
In the delightful world of desserts, Butterfinger cake stands out as a classic treat that marries rich flavors with a touch of nostalgia. Each bite is a wonderful blend of creamy, chocolatey, and peanut buttery goodness that can instantly bring back childhood memories. Whether you’re making it for a special occasion or just to satisfy your sweet tooth, this cake is sure to impress your friends and family.
Don’t hesitate to get creative with your toppings or additions! The versatility of this cake makes it perfect for personal twists. So, grab your ingredients and let the baking adventure begin—you won’t regret it!
Print
Chocolate Cake with Peanut Butter Whipped Cream
- Total Time: 1 hour
- Yield: 12 servings 1x
- Diet: Vegetarian
Description
This delicious chocolate cake topped with peanut butter whipped cream and crushed Butterfinger bars is a perfect dessert for any occasion.
Ingredients
Scale
- 1 chocolate cake, baked in a 9×13” pan
- 1 recipe caramel sauce, or one 16oz jar caramel topping
- 7 ounces sweetened condensed milk
- 1 1/2 cups heavy whipping cream
- 1 ½ Tablespoons creamy peanut butter
- 1/4 cup powdered sugar
- 3 Butterfinger bars, chopped
Instructions
- Bake cake in a 9×13” pan according to recipe directions. Allow cake to cool for a few minutes, then poke holes in it with a fork or wooden skewer.
- Pour caramel sauce and sweetened condensed milk all over the top of the cake. Set aside to cool completely.
- Topping: Add the peanut butter and powdered sugar to a mixing bowl and mix until smooth. While mixing, slowly pour in whipping cream. Whip until stiff peaks form, and it holds its shape.
- Finish: Spread the peanut butter whipped cream over the cooled cake and sprinkle crushed Butterfinger bars on top. Refrigerate for at least 1 hour, or up to one day, before serving.
Notes
- For a richer flavor, you can use dark chocolate for the cake.
- The cake can be made a day in advance and stored in the refrigerator.
- Prep Time: 30 minutes
- Cook Time: 30 minutes
- Category: Dessert
- Method: Baking
- Cuisine: American
Nutrition
- Serving Size: 1 slice
- Calories: 350
- Sugar: 20g
- Sodium: 150mg
- Fat: 22g
- Saturated Fat: 10g
- Unsaturated Fat: 8g
- Trans Fat: 0g
- Carbohydrates: 30g
- Fiber: 1g
- Protein: 5g
- Cholesterol: 80mg